How do I create a ticket?
How to Create a Ticket in the Portal
Welcome to the portal! Follow these simple steps to create a ticket and manage your requests effectively:
Step 1: Sign In
Open your web browser and go to the https://portal.webdesigninc.ca.
Enter your username and password in the sign-in fields.
Click the “Sign In” button to access your dashboard.
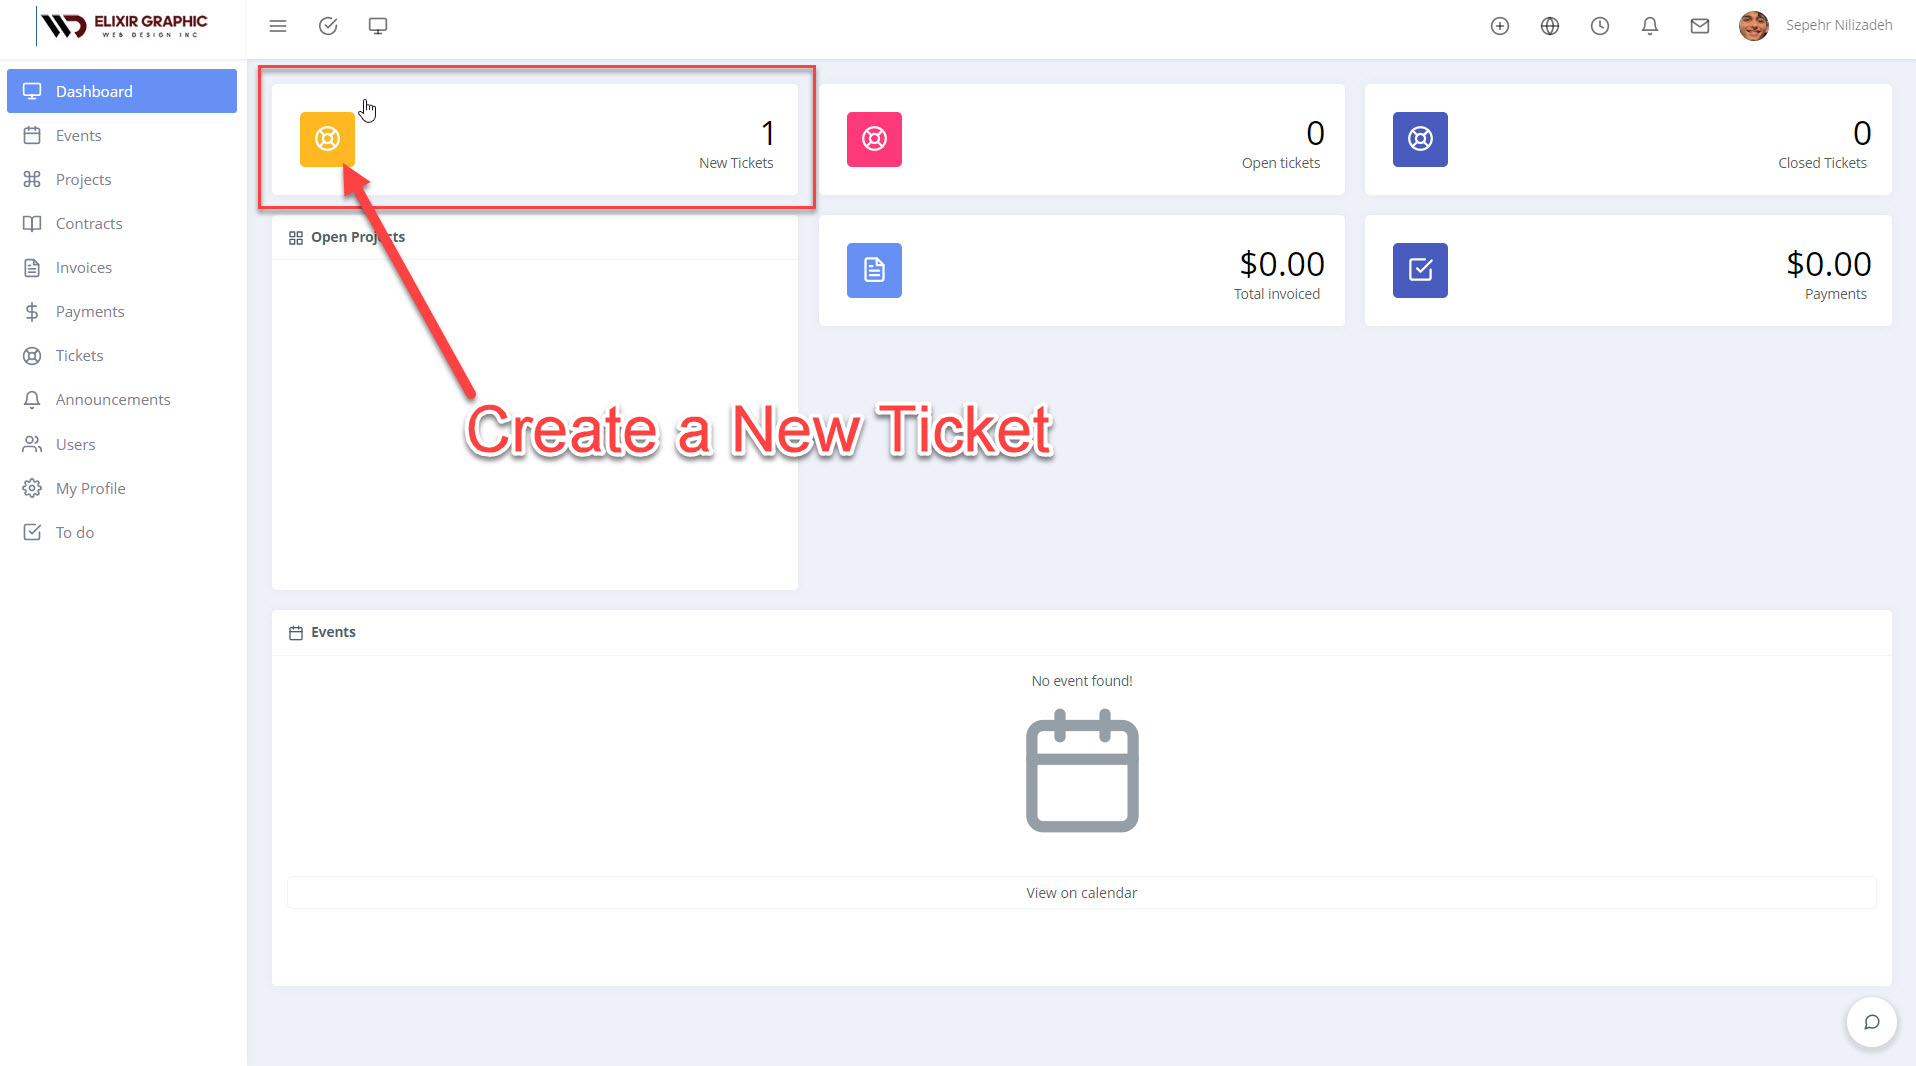
Step 2: Access the Ticketing Section
Click on the “New Tickets” to access the ticketing section.
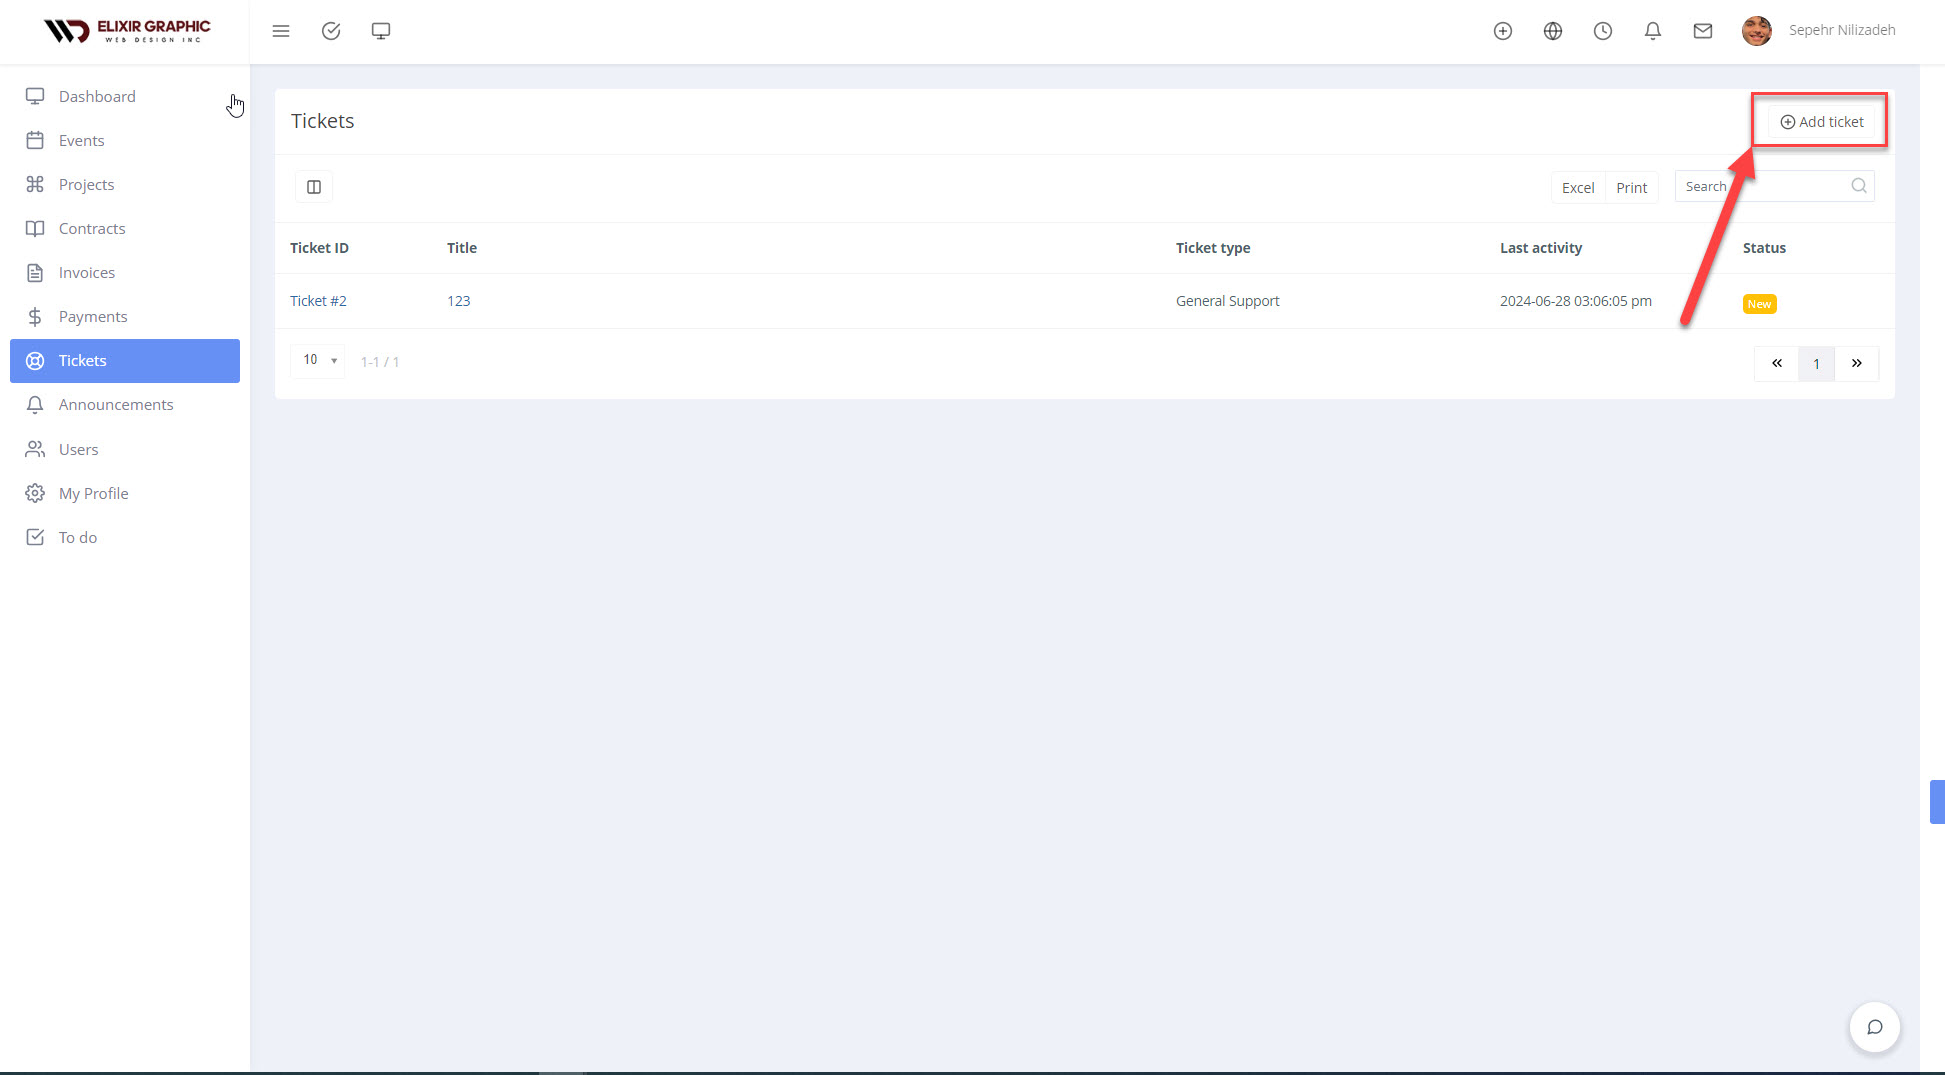
Step 3: Create a New Ticket
- In the ticketing section, click on the “Add Ticket” button. This will open a new ticket form.
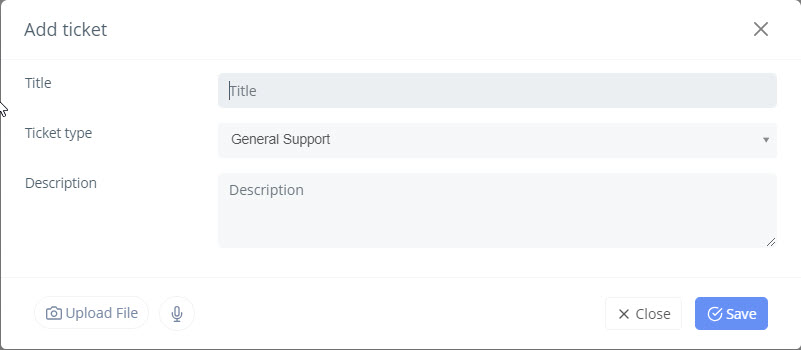
Step 4: Fill Out Ticket Details
- Subject: Enter a brief subject or title for your request.
- Description: Provide a detailed description of the issue or request. Be as specific as possible to help our support team understand and address your concern quickly.
- Category: Select the appropriate category for your request from the dropdown menu. This helps in routing your ticket to the right department.